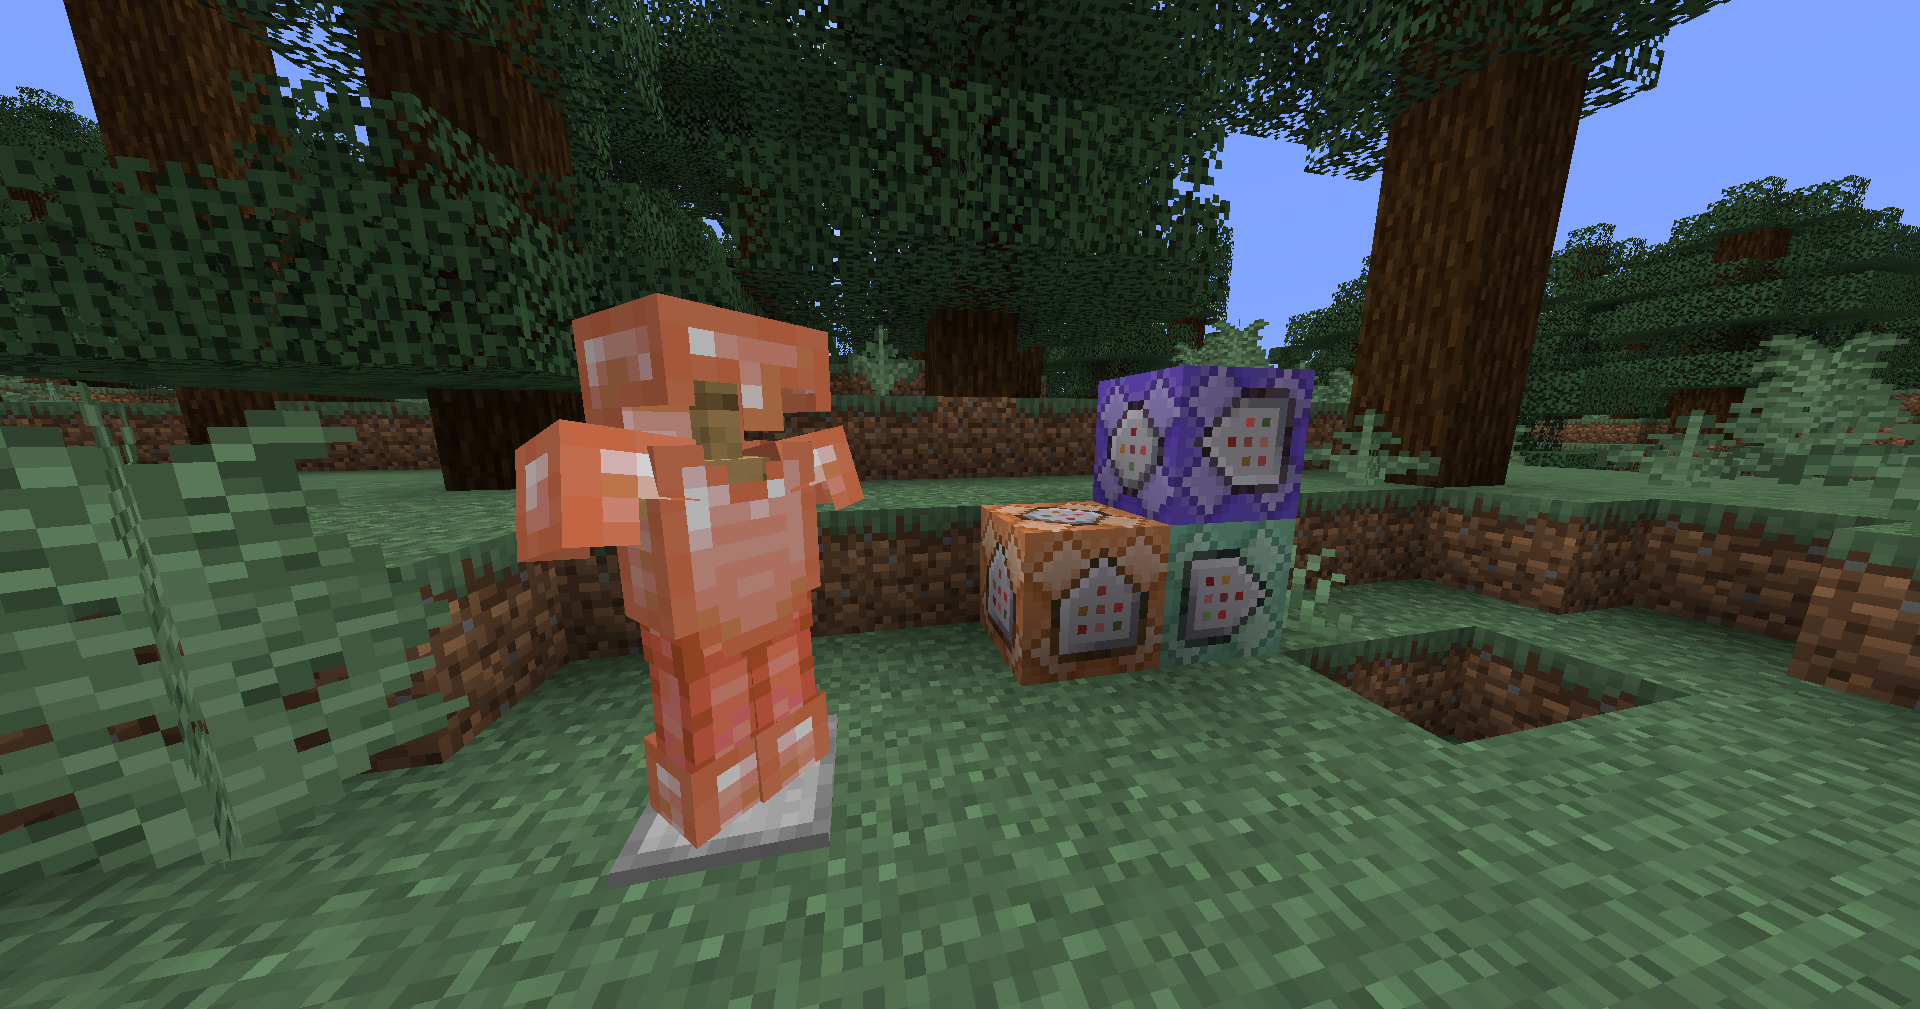
In this tutorial, I’ll show you all the steps required to create custom armor with just a datapack and resource pack. To make this work, we’re going to use armor trims and custom model data.
1. Creating the datapack
First, we’re going to need a datapack to add the armor trims for our custom armor. You can find detailed instructions on how to create a datapack on the Minecraft Wiki. Follow the steps over there until “Adding content to your pack”.
If you’re done with that, add a folder named data in your pack folder. In that folder, create another folder and name it however you want. I’ll name mine my_pack. Make sure that it only contains lowercase letters, numbers, some special characters ( _, -, . ) and NO spaces! Remeber this restriction for any other name you’ll use in this datapack!
Then, add two more folders to the folder you just created: trim_pattern and recipes. You won’t need the recipes folder if you don’t want your armor to be craftable. No we’re done with the general structure of the datapack, so let’s start adding our custom armor!
2. Adding the armor trims
To add custom armor, we are going to create custom armor trims. Those armor trims will overlay the vanilla armor completely, making it look like we have entirely different armor. Armor trims consist of two parts: the pattern and the material. The pattern defines how an armor trim looks like and the material defines the color.
For our custom armor, we’re only going to need a pattern. We don’t need different colors, so we’ll just use one of the vanilla materials later on.
Open the trim_pattern folder and create a .json file with the name of your custom armor (for example copper_armor.json).
Now open the file and add the following data:
{
  "asset_id": "my_pack:my_armor",
  "description": {
    "translate": ""
  },
  "template_item": "minecraft:barrier"
}
The asset_id property defines the texture for the armor trim, replace “my_armor” with the name of your custom armor and “custom” with the name of the folder you created earlier in the data folder. We’ll call this folder the namespace from now on. Make sure to use the same name for your armor everywhere! The translate property in description sets the name of your armor trim that will be displayed in the inventory. We’re not going to need a name, so just leave it empty.
The last thing to check is the template_item property, it defines what item (usually a smithing template) you would need in a smithing table to apply the trim to armor. Since we don’t want players to create this armor using the smithing table, we’ll just use an item that’s impossible to get in survival. I used a barrier here. (Note: We can tecnically use any item here, since the player won’t we able to actually put it in the smithing table without adding the item to a specific tag)
Now we’re done with the easy part, lets move on to the resource pack.
3. Creating the resource pack
Creating a resource pack is really similar to a datapack, just do the same steps, but instead of creating a data folder, name it assets.
Now add two folders in the assets folder, name one just like your namespace in the datapack and name the other one minecraft. You’re going to need a lot of folders, so just try to recreate this structure:
- assets
-
my_pack
- models
- item
- textures
- item
- trims
- models
- armor
- models
- models
- minecraft
- atlases
- models
- item
-
my_pack
Again, replace my_pack with your namespace. Let’s start with adding the textures for our custom armor trims. Navigate to assets/(your namespace)/textures/trims/models/armor.
Now you’re going to need two files: The 1st and 2nd layer armor textures. Those files are used to define how the armor looks when worn. You can just recolor the vanilla ones or create your own custom textures. You can find them in the vanilla resource pack under assets/minecraft/textures/models/armor. Name the first layer my_armor.png and the second layer my_armor_leggings.png (replace my_armor with the name of your custom armor). The images have to be .png files!
Now we need to add our images to the vanilla texture atlas. A texture atlas is a file that is generated at runtime to make it easier for the game to load textures, by placing all textures on one texture and grabbing a specific region of the atlas when displaying a texture. This is done internally for blocks, items and many other textures. Minecraft doesn’t automatically add our trim textures to the armor trim atlas, so we need to add them manually. Navigate to assets/minecraft/atlases and create a file named armor_trims.json.
Add the following content:
{
  "sources": [
    {
      "type": "minecraft:paletted_permutations",
      "textures": [
        "my_pack:trims/models/armor/my_armor",
        "my_pack:trims/models/armor/my_armor_leggings"
      ],
      "palette_key": "trims/color_palettes/trim_palette",
      "permutations": {
        "quartz": "trims/color_palettes/quartz",
        "iron": "trims/color_palettes/iron",
        "gold": "trims/color_palettes/gold",
        "diamond": "trims/color_palettes/diamond",
        "netherite": "trims/color_palettes/netherite",
        "redstone": "trims/color_palettes/redstone",
        "copper": "trims/color_palettes/copper",
        "emerald": "trims/color_palettes/emerald",
        "lapis": "trims/color_palettes/lapis",
        "amethyst": "trims/color_palettes/amethyst"
      }
    }
  ]
}
Same thing here, you’ll have to replace my_pack with your namespace and my_armor with the name of your custom armor. This will tell minecraft to add our textures to the armor trim atlas when it’s generated at runtime.
4. Custom model data
Now we’re done adding our custom armor trims. We can give the items themselves custom textures using custom model data. If you don’t know how to apply custom model data to items, I’d recommend following this tutorial by KasaiSora. Make sure to use the name number for every piece of armor!
5. Creating a recipe
If you want players to be able to craft your new custom armor, you can add a crafting recipe in your datapack!
Go into the recipes folder in your datapack and create a new file, just give it the same name as your armor piece (make sure to add the .json extension).
Now add the following content:
{
    "type": "minecraft:crafting_shaped",
    "category": "equipment",
    "pattern": [
        "XXX",
        "X X",
        "   "
    ],
    "key": {
        "X": {
            "item": "minecraft:copper_ingot"
        }
    },
    "result": {
        "id": "minecraft:diamond_helmet",
        "components": {
            "minecraft:custom_model_data": 1,
            "minecraft:trim": {
                "pattern": "my_pack:my_armor",
                "material": "minecraft:quartz",
                "show_in_tooltip": false
            },
            "minecraft:item_name": "{\"text\":\"Copper Helmet\"}"
        }
    }
}
This will create a recipe for your custom armor. The pattern part defines how the items should be placed in the crafting table. I’m using the shape for a helmet here.
What material the X refers to can be set in the key section. I used a copper ingot as an example, but you can use anything you want here.
The result property defines what item will be crafted out of this recipe. Replace the id part with the armor piece you’re making the recipe for.
Make sure to replace the number in custom_model_data with the one you used in your resource pack.
Also remeber to replace my_pack and my_armor again. The minecraft:trim part defines what armor trim we’re applying to the item. As pattern, we’re using our new custom armor pattern, and for the material we can just use any vanilla one, I recommend using quartz though. The show_in_tooltip property will prevent the armor trim from showing up in the item tooltip and the minecraft:item_name property will rename our item from “Diamond Helmet” to “Copper Helmet”. You should replace this name with you armor too.
6. Obtaining using commands
If you don’t want your armor to be craftable, you can obtain it using commands. The item data of the command is the same as in the components section of the recipe file abobe, so just do the same replacements for the values.
This is the command to obtain your custom armor:
/give @s minecraft:diamond_helmet[minecraft:custom_model_data=1,minecraft:trim={pattern:"my_pack:my_armor",material:"minecraft:quartz",show_in_tooltip:false}, minecraft:item_name='{"text":"Copper Helmet"}']
Now you’ve created completely custom armor using only a datapack and resource pack, with the power of armor trims!